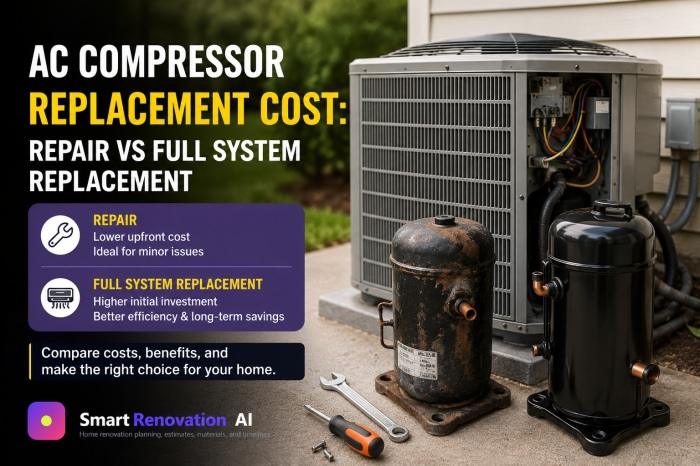
AC Compressor Replacement Cost: Repair vs Full System Replacement
A failed compressor is one of the most expensive single-part failures an AC system can have, and it is also one of the easiest to overpay for. The part itself is only one line on the invoice. Refrigerant, labor, access, warranty status, and the condition of the rest of the system all move the final number just as much as the compressor itself.
This guide breaks the job into its real cost components, walks through the diagnostic and installation sequence, and explains the point at which replacing the compressor stops being the smart move and replacing the whole outdoor unit becomes the better value. It is planning information, not a quote the goal is to help a homeowner understand what belongs in an honest estimate before a contractor is called.
Quick Planning View
Compare compressor replacement cost against unit age, refrigerant type, warranty coverage, tonnage, access difficulty, and whether the rest of the system is healthy enough to justify the repair.
When This Estimate Makes Sense
This article is for the early planning stage: before a homeowner approves a quote, orders a part, or assumes the first number they hear is the market rate. It is not a final contractor price. It is a way to understand what should be included in the scope and what needs to be confirmed on-site before any work begins.
Early planning also protects trust on both sides. A technician can be completely fair and still hand over a confusing invoice if the homeowner never asked what was included. The more clearly the job is defined up front repair or replace, in-warranty or not, same refrigerant or not the easier it becomes to compare one quote against another.
Project Scope: Like-for-Like Repair vs a Bigger Job
Not every “compressor replacement” is the same project, and the scope determines the price range more than almost anything else.
A simple like-for-like swap means the failed compressor is replaced with a matching or manufacturer-approved equivalent, in the same location, using the same refrigerant type, on a system that is otherwise sound. Wiring, refrigerant lines, and the electrical disconnect stay as they are. This is the lowest-cost version of the job.
A more involved job changes something beyond the part itself:
- The system uses an older refrigerant (such as R-22) that is no longer produced or is now expensive, forcing a retrofit or a full changeover to a current refrigerant.
- The compressor tripped repeatedly and damaged the compressor windings, the start components, or the wiring, meaning more than the compressor needs to be replaced.
- The unit is old enough that the manufacturer no longer stocks a matching compressor, requiring an aftermarket or universal unit and additional labor to fit it.
- Local code now requires upgraded disconnects, wiring, or a condensate safety switch that was not present on the original installation.
Confirming which category the job falls into before a number is quoted is the single most useful thing a homeowner can do early in the process.
Cost Factors to Separate First
| Estimate line | Why it matters |
|---|---|
| Compressor size and type | Tonnage and compressor design (reciprocating, scroll, rotary, inverter/variable-speed) directly change part cost. |
| Refrigerant type | Older refrigerants can cost far more per pound than current ones, and some require a system retrofit. |
| Warranty status | A compressor still under manufacturer warranty may be free, but labor, refrigerant, and diagnostic fees usually are not. |
| Unit age | Older units may lack available parts, pushing the job toward aftermarket parts or full replacement. |
| Access and location | Rooftop, tight side-yard, or second-story condenser locations add labor time and sometimes equipment rental. |
| Root cause of failure | A compressor that failed from a refrigerant leak or electrical fault needs that root cause fixed too, or the new compressor fails again. |
| Permit requirements | Some jurisdictions require a permit for refrigerant work or electrical disconnect changes. |
| Disposal | Old refrigerant must be recovered and the failed compressor disposed of according to local rules, which is a real cost, not an afterthought. |
Materials, Services, and Allowances
Depending on the exact condition found on-site, a complete estimate may include:
- replacement compressor (OEM or manufacturer-approved aftermarket)
- refrigerant charge (by weight, priced per pound)
- start capacitor, run capacitor, contactor, or hard-start kit
- filter-drier replacement (standard practice any time the refrigerant circuit is opened)
- refrigerant line flushing or replacement if contamination is found
- electrical disconnect, wiring, or breaker upgrades if required by code
- condensate safety switch or pan repair
- disposal and refrigerant recovery fees
- permit fee, where applicable
Not every item belongs in every quote. A newer system with a clean electrical fault may only need the compressor, capacitor, and a refrigerant charge. An older system with a burned-out compressor may need most of the list above. The point is to match the material and service list to the actual condition found, not to a generic template.
Low, Typical, and High Cost Scenarios
These are planning ranges, not fixed prices. Actual cost depends on tonnage, refrigerant, brand, warranty status, and local labor rates.
Low-end scenario: A smaller residential unit (around 1.5 to 2.5 tons), current refrigerant, straightforward ground-level access, and a compressor still under manufacturer warranty. In this case the homeowner is often paying mainly for labor, refrigerant, and standard parts, since the compressor itself may be covered.
Typical scenario: A mid-size central AC compressor (roughly 3 to 4 tons) with the part purchased at full price, current refrigerant, and normal access. This is the range most homeowners see when the warranty has expired and the job is a clean, like-for-like swap.
High-end scenario: A larger unit, an older or discontinued refrigerant requiring extra handling or a retrofit, difficult access, a scroll or variable-speed compressor, and a root cause (such as a slow refrigerant leak) that needs its own repair before the new compressor is installed. This scenario can approach or exceed the cost of a full outdoor unit replacement, which is exactly the comparison a homeowner should make before approving it.
National averages circulated online are a useful starting reference, but they are not a substitute for a technician actually diagnosing the unit and confirming refrigerant type, tonnage, and warranty status in person.
Why Two Similar-Looking Jobs Get Very Different Quotes
Two homes with what looks like “the same AC problem” can receive very different prices for reasons that are not obvious from the outside:
- Warranty coverage. One unit may have a transferable manufacturer warranty on the compressor; the other may be a few months past expiration.
- Refrigerant type. A system still running an older, phased-out refrigerant costs more to service than one on a current refrigerant, sometimes by a wide margin.
- Root cause vs symptom. A quote that only replaces the compressor is cheaper than one that also finds and repairs the leak or electrical fault that killed it but the cheaper quote may fail again within a year.
- Compressor type. Standard single-stage compressors are generally less expensive to source than two-stage or variable-speed (inverter) compressors used in higher-efficiency systems.
- Access. A condenser tucked behind a locked gate, on a roof, or wedged against a fence adds labor time that a ground-level unit in an open side yard does not.
- Company overhead and stock. A company that keeps common compressors in stock can often move faster and sometimes cheaper than one special-ordering a part.
Common Symptoms, Likely Causes, and How Technicians Confirm the Diagnosis
Symptoms that often point to the compressor:
- The outdoor unit hums or clicks but the fan does not spin and the system does not cool.
- The system trips the breaker repeatedly, especially on hot afternoons.
- The compressor runs hot to the touch and shuts off after a few minutes (thermal overload protection).
- Loud grinding, rattling, or a sudden bang from the outdoor unit followed by loss of cooling.
- The system cools poorly for weeks before failing completely, suggesting a slow refrigerant leak that eventually starves the compressor.
Underlying causes a technician checks for:
- Refrigerant undercharge or leak, which causes the compressor to run hot and eventually fail.
- Electrical faults, a failed capacitor, contactor, or wiring issue that overworks or damages the compressor.
- Restricted airflow over the outdoor coil (dirt, debris, failed fan motor) causing the compressor to overheat.
- Age-related wear on the compressor’s internal components after many years of normal operation.
- Liquid refrigerant returning to the compressor (flooding), often from a metering device or airflow problem elsewhere in the system.
How the diagnosis is confirmed, not guessed: checking amperage draw against the compressor’s rated specs, testing capacitors and the contactor, checking refrigerant pressures against manufacturer charts, and in some cases pulling an electrical resistance test on the compressor windings to confirm an internal short or open winding.
Which Faults Can Be Repaired, and When Replacement Is the Safer Choice
Often repairable without replacing the compressor:
- A failed capacitor, contactor, or wiring connection that was simply overworking the compressor.
- A minor, locatable refrigerant leak that can be sealed and the system recharged.
- A dirty or blocked outdoor coil restricting airflow and causing the unit to overheat.
Usually points toward compressor replacement:
- A confirmed internal short, open winding, or locked rotor on electrical testing the compressor itself has failed internally and cannot be repaired.
- Compressor failure caused by a refrigerant leak that went undetected for a long time, since the compressor may have run low on refrigerant (and the oil that circulates with it) for an extended period.
- Repeated trips on thermal overload even after electrical components have been replaced and airflow confirmed normal.
Usually points toward full system replacement rather than just the compressor:
- The unit is well past the midpoint of its typical service life and other components (coil, fan motor, controls) are also aging or showing wear.
- The system uses a refrigerant that is being phased out, making the compressor and any future repair progressively more expensive to source.
- The compressor has failed more than once, suggesting a recurring root cause in the broader system rather than a one-off part failure.
- The efficiency gap between the old system and a current one is large enough that the energy savings materially offset part of the replacement cost over time.
The Installation Sequence, Start to Finish
- Diagnosis and confirmation — electrical testing, refrigerant pressure checks, and visual inspection to confirm the compressor is the actual point of failure.
- System shutdown and refrigerant recovery — refrigerant is legally recovered into a certified tank rather than vented, and electrical power is locked out.
- Removal of the failed compressor — refrigerant lines and electrical connections are disconnected and the old unit is removed.
- Line and system flushing (if needed) — if the failure was severe (a “burnout”), the refrigerant lines and coils may need to be flushed to remove contamination before the new compressor is installed.
- Setting and connecting the new compressor — the replacement unit is mounted, brazed or connected to the refrigerant lines, and wired according to manufacturer specifications.
- Filter-drier replacement — a new filter-drier is installed any time the sealed refrigerant system is opened; this is standard practice, not an upsell.
- Pressure and leak testing — the system is pressurized with nitrogen and checked for leaks before it is charged with refrigerant.
- Evacuation — the system is vacuumed down to remove air and moisture, which protects the new compressor from immediate damage.
- Refrigerant charging — refrigerant is added to the manufacturer’s specified charge, weighed in rather than estimated.
- Startup, testing, and commissioning — amperage draw, pressures, temperature split, and airflow are checked against manufacturer specifications to confirm the system is operating correctly.
- Final walkthrough — the technician explains what was found, what was replaced, and what warranty applies to the part and the labor.
Hidden Enabling Work That Belongs in an Honest Estimate
Some of the most common items left off a bare-bones quote:
- Electrical work: replacing a worn disconnect box, upgrading wiring that does not meet current code, or replacing a breaker that has been repeatedly tripped.
- Structural support: repairing or replacing a cracked or sinking condenser pad, especially on older installations.
- Drainage and condensate: repairing a clogged or damaged condensate line or adding a required safety switch.
- Ventilation and clearance: trimming vegetation or relocating obstructions so the outdoor unit gets proper airflow, which protects the new compressor from the same overheating failure.
- Line set condition: repairing or replacing damaged or improperly insulated refrigerant lines discovered during the job.
None of these are guaranteed on every job, but a technician who never mentions them and a technician who checks for them and explains why they either are or are not needed are giving two very different levels of estimate.
Equipment Sizing, Compatibility, Efficiency, and Commissioning
A replacement compressor has to match more than just the failed part number. It needs to be compatible with the system’s refrigerant type, its rated tonnage, and for higher-efficiency systems its staging (single-stage, two-stage, or variable-speed/inverter). Installing a mismatched compressor can cause poor cooling, short cycling, or premature failure, even if it physically fits.
Commissioning is the step that confirms the match actually works: checking the temperature split across the evaporator coil, confirming refrigerant charge against subcooling and superheat targets, and verifying that controls and the thermostat are communicating correctly with the outdoor unit. Skipping commissioning is one of the more common ways a “successful” repair turns into a callback a few weeks later.
When Replacing Just the Compressor Is Poor Value
Replacing a single component can be the wrong financial call when the rest of the system is not in a condition to support it. This is worth weighing seriously when:
- The system is already near or past the point where most manufacturers and technicians consider a unit to be at the end of its typical service life.
- The compressor failure is the second or third major repair in a short window, meaning money already spent on other repairs adds to the sunk cost.
- The refrigerant type is being phased out, so every future repair not just this one will cost more than it would on a current system.
- The rest of the system (coil, blower motor, ductwork) is old enough that a mismatched pairing with a brand-new compressor limits both performance and efficiency.
In these situations, the cost of the compressor repair should be compared directly against the cost of full outdoor unit replacement, factoring in the remaining life of the rest of the system and the efficiency gap between old and current equipment not evaluated as an isolated repair decision.
Timeline Factors That Change the Schedule
A straightforward, in-stock compressor swap can sometimes be completed same-day. Realistic delays usually come from:
- special-ordering a compressor that is not commonly stocked
- refrigerant availability, especially for older refrigerant types
- permit processing where required
- time needed for line flushing after a severe compressor burnout
- scheduling around extreme weather, which is also peak demand season for HVAC companies
A realistic planning sequence often looks like: diagnose, confirm warranty status, price repair vs. replacement, order parts if needed, complete the repair, commission and test, and document the warranty terms for both the part and the labor.
Questions Worth Asking Before Work Starts
- Is the compressor still under manufacturer warranty, and does that cover labor too, or only the part?
- What caused the compressor to fail, and is that root cause being fixed as part of this job?
- What refrigerant does the system use, and is it still being produced?
- Is this an OEM part or an aftermarket equivalent?
- What is the warranty on the labor, separate from the part?
- At what point would replacing the whole outdoor unit make more sense than this repair?
Good questions do not make the job harder. They make the quote easier to compare against a second opinion, which is worth getting on any compressor-level repair given the cost involved.
Supplier and Company Categories to Check
Relevant local searches may include:
- licensed HVAC repair contractors
- HVAC equipment and parts suppliers
- refrigerant reclaim and disposal services
- electrical contractors, if panel or disconnect upgrades are needed
These categories are a starting point for research and quote comparison. Licensing requirements, stock availability, and service area still need to be confirmed locally.
Mistakes That Create Bad Estimates
- Accepting a compressor-only quote without asking what caused the failure in the first place.
- Not confirming refrigerant type before comparing quotes, since it changes the price significantly.
- Assuming a warranty covers labor when it may only cover the part.
- Skipping a second opinion on a large repair that approaches the cost of full replacement.
- Not asking whether the new compressor is OEM or aftermarket, and what that means for future service.
The pattern behind most bad estimates is the same one that shows up across every major home repair category: the price becomes unreliable when the scope was never clearly defined before the number was given.
Safety, Access, and Permit Notes
Compressor replacement involves refrigerant handling and electrical work that must be performed by a licensed and certified technician refrigerant recovery and handling in particular is federally regulated and is not a homeowner task.
Permit rules, licensing requirements, and refrigerant regulations vary by location and by the scope of work involved. A planning estimate like this one should never replace a qualified on-site diagnosis, especially for work that touches electrical systems, pressurized refrigerant lines, or structural mounting.
Where This Fits in the Planning Process
For a project-specific starting point built around this exact category of repair, the AC and HVAC repair planner keeps the estimate tied to the right scope instead of a generic renovation template.
If it is still unclear whether this is a repair, a partial fix, or a sign the whole system needs replacing, the renovation cost estimator can help separate required work from optional upgrades before any provider is contacted. The free AI planner on the Smart Renovation AI homepage can walk through the same questions covered above warranty status, refrigerant type, symptoms, and access and turn them into a documented starting point for quotes.
The goal is not to turn every homeowner into a technician. The goal is to give enough structure to ask the right questions and recognize when a quote is missing something important especially on a repair where the gap between “fine” and “should have been a full replacement” can be a few hundred dollars in diagnosis time.
Final Takeaway
AC compressor replacement cost is easier to estimate once the refrigerant type, warranty status, root cause of failure, and access conditions are known. A careful estimate explains not just the part price, but what enabling work, testing, and commissioning are included and it should always be weighed against the alternative of replacing the full outdoor unit when the rest of the system is aging alongside the compressor.
FAQs
What is the first thing to check before pricing a compressor replacement?
Confirm the diagnosis first. A hot, cycling, or silent compressor can be caused by a bad capacitor, a refrigerant leak, or airflow restriction rather than the compressor itself, and electrical testing is the only reliable way to confirm an actual internal compressor failure.
Is the compressor usually covered under warranty?
Sometimes, but warranty coverage on the part does not automatically include labor, refrigerant, or diagnostic fees. Always ask whether the warranty is on the part only or on the part and labor together, and confirm it is still valid and transferable if the system changed ownership.
Why do compressor replacement quotes vary so much between companies?
Refrigerant type, compressor staging (single-stage vs. variable-speed), access difficulty, whether the root cause is also being repaired, and whether the part is OEM or aftermarket all shift the price. Two quotes that look similar on paper can include very different scopes of work.
When does it make more sense to replace the whole outdoor unit instead of just the compressor?
When the system is already near the end of its typical service life, has had repeated major repairs, runs on a refrigerant that is being phased out, or when the compressor repair cost starts to approach a meaningful share of full replacement cost.
Can a homeowner recharge refrigerant or replace a compressor themselves?
No. Refrigerant handling requires certification, and improper handling is both a safety risk and, in most places, illegal without the correct license. This work should always go to a licensed HVAC technician.
How can Smart Renovation AI help with this decision?
The planner can help organize the symptoms, warranty status, refrigerant type, unit age, and repair history into a clear starting point, so the conversation with a local contractor starts from a defined scope rather than a guess.